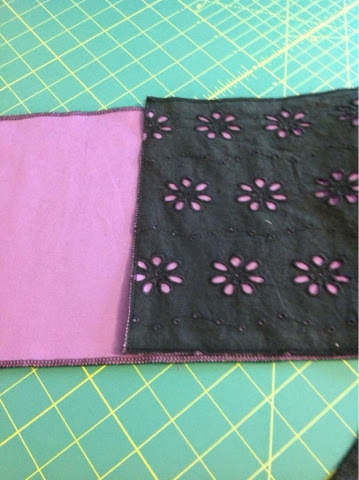
I made a size 2 so it will last Miss K all summer and maybe even into fall with a long sleeve underneath. I made duplicates of every outside facing pattern piece (one in eyelet and one in the purple) and serged all the edges before construction. I cut the skirt 21" x 8", but next time will probably do 19"x10".
Monday, April 28, 2014
Hummingbird Dress - Hack into top and photo instructions
I had some if this black eyelet leftover from making my sister a dress years ago. I've been dying to use and it a top version of the Hummingbird Dress from Rabbit Rabbit Creations was the perfect fit. I had to find something to go under it though.... I was hoping to use batiste or broadcloth but all Joann's had was Kona cotton. So, it's a little thicker than I had panned but it works.
Hummingbird Dress Review - tested for Rabbit Rabbit Creations
I LOVE testing for Rabbit Rabbit Creations. Jasmin always has wonderful designs that go together beautifully. So happy I could be a part of the testing process for the infamous Hummingbird Dress.
Pattern Name: Hummingbird Dress
Designer: Rabbit Rabbit Creations
Pattern Description: PDF pattern, Tea length dress with thin straps and elastic back waistband. Has three different skirt fullness options as well as optional flutter sleeves. More seen here https://www.etsy.com/listing/187902112/hummingbird-dress-girls-summer-dress-pdf?ref=shop_home_active_5
Pattern cost: $7.00 a GREAT value in my opinion.
Pattern Sizing: girls' sizes 1-12
Size Made: Size 1 and size 2. Size 1 is a perfect fit, size 2 is a little big and has room to grow.
Model's Measurements: height-32", chest-18 1/4", waist-17 1/2", hips-20"
Did it look like the photo/drawing advertised once you were done sewing with it? Yep
Dealing with the pattern: Only 3 pages to print out. Easy to tape together - only front and back bodice provided. Measurements given for straps and skirt pieces.
Level of difficulty: easy depending in the fabric your are working with. Special occasion fabrics up to difficulty level.
Were the instructions easy to follow? Amazing!! This dress in so easy to make and the instructions/photos make even a beginner successful. The bodice goes together relatively quickly, then you just add the skirt/s.
What did you particularly like or dislike about the pattern? I love that there are so many style options for this dress. It can be a super casual, cotton top, or a fancy, flowy tea length dress. Everything in between is possible too!
Fabric Used: multiple versions made - mostly used quilting weight cotton for the bodice and any combination of quilting cotton, charmuese or chiffon for the skirt.
Pattern alterations or any design changes you made: Aside from chopping one version down to a top, none. It doesn't need any alterations!! Can also be lengthened to a maxi.
Would you sew it again? Yes!
Would you recommend it to others? Highly recommended. You need to make some, not one :-)
Conclusion: This is my new go-to summer top/dress pattern.
This is the Something Special version. It has a two layered, full skirt. Made of poly chiffon upcycled from a women's dress.
This is the Dress-up version. I just did one layer skirt in poly charmuese as well as flutter sleeves. I didn't quite understand the flutter sleeve directions during testing so these didn't turn out so well.... I won't give up though. I'll try again soon!
Wednesday, April 23, 2014
Sneak Peek
I love pattern testing.... It's a great opportunity for me to sew on a deadline, for my little one or myself, and sew as economically as possible. I take great pride and responsibility in testing patterns for designers because I truly do enjoy it.
Tuesday, April 8, 2014
The time is now!!
Time to start blogging, that is :-) I've created a blog to go along with my sewing endeavors. Hope to keep track of patterns I've used and reviews this way.
Subscribe to:
Comments (Atom)


